
Since i like to cook and draw, i always like to find a way to do them together. Everytime i cook i like to decorate my food with anything simple that can give my food a little touch of art. In addition, i’m bad in making sugar cookies or even to decorate them and i was going to try to make them this weekend for my friends and i thought about finding some easy ideas in how to decorate sugar cookies because to me it’s the important that cookies looks good as it tastes good.
Moreover, I found this awesome website that has 5 ways to decorate sugar without piping!
It means we don’t need to use any bags to do that! Isn’t cool?
as it says in the website:
To save us all some precious time and energy, I investigated a number of ways to apply royal icing without having to break out the tips and piping bag. Why pipe when you can dip, spread, brush, splatter and drizzle your way to stunning treats that only look like they took hours to make?
1. Just Dip It
This method is one that savvy cookie decorators have been using for years. The first time I saw it done my jaw dropped, because it’s sosimple and so effective.

Here’s the basic technique: Start with royal icing that’s been thinned to the consistency of creamy salad dressing. (I know that’s might not be the most appetizing analogy, but I think it tells the story.)

Hold a sugar cookie by the sides, dip the top of the cookie in the royal icing, lift the cookie from the icing and gently shake away the excess. That’s it.

You can use a spatula or knife to spread the icing out, but it’s really not necessary. Set the cookie on a drying rack or cookie sheet until the icing has set up firm, at least an hour.
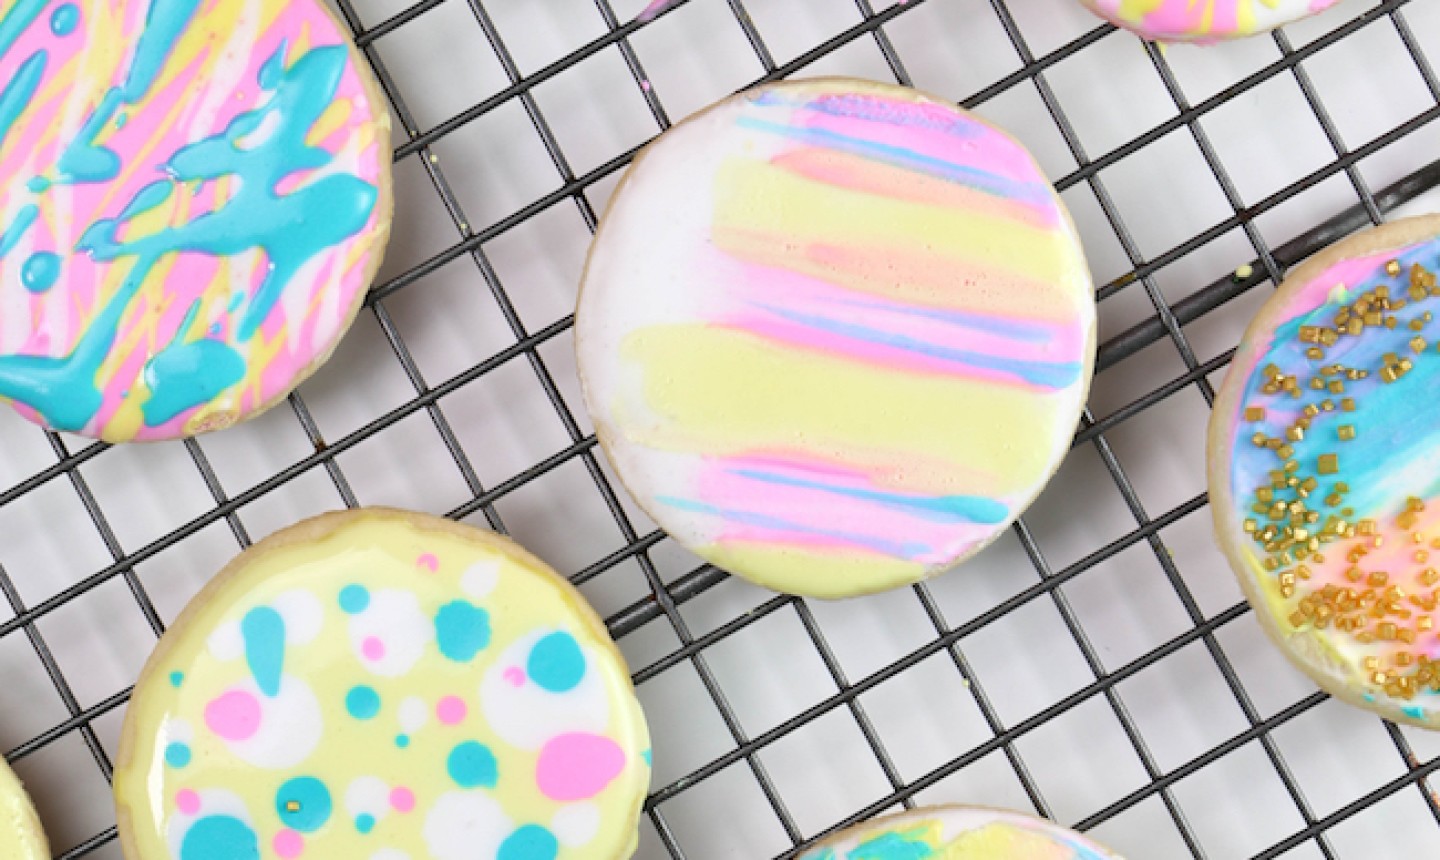
The Marbled Dip

Just because dipping is easy doesn’t mean we can’t make it look fancy. Try combining colors of royal icing in a bowl and dipping your cookie into the swirl. Twist the cookie a little as you lift it from the icing to exaggerate the marbled effect.

The Two-Tone Dip
For this dipping method you’ll come in from the side for a two-tone look.

Scrape the bottom of the cookie off on the edge of the bowl before setting it on a drying rack or cookie sheet to set up.

(Be more patient than I was and wait until the first color has completely hardened before moving onto the second color.)

2. Spread Away
Yes, I know I’m not rocking anyone’s world by suggesting you spread royal icing on a cookie with a knife or icing spatula. I believe that’s a technique probably as old as cookies themselves. What I am suggesting is taking a new look at the time-honored technique and borrowing a few design ideas from the cake world — watercolor and two-tone.
The Watercolor Effect

Start with a solid base coat, but don’t let it dry. Immediately move on to adding dollops of different icing colors all over the cookie. It’s OK if they smear together, it’s only going to get messier from here.

Swipe the blade of an icing spatula across the surface of the cookie to smooth the icing over and blend the colors. Spread in one direction only to prevent the colors from becoming too muddled.

Finish it with sprinkles, because who doesn’t love a little bling?
The Two-Tone Effect

Create a simple two-tone effect using the same techniques as above, but with no base coat.

Smear one color of icing over part of the cookie and immediately spread another color on the other side of the cookie. You don’t have to stop at two, like I did. If you’re feeling ambitious you could alternate colors for a striped effect or add a gradient of colors for an ombré look.

Swipe the blade of an icing spatula across the surface of the cookie, covering both colors at the same time. This will allow the line to blend without muddling the colors.
3. Splatter Something
Use the dip or spread method for the base coat of your cookie. Thin a few colors of icing down to a watery consistency. The icing should be thin enough to splatter easily, but not so thin that the color is transparent.

Dip a clean paintbrush in the icing and flick the bristles to create splatters on your cookie.

Splatter your cookies before your base coat hardens for an embedded-icing look, or wait until the base colors are dry and your splatters will add a raised texture to the cookie.
4. Do The Drizzle

Similar to their splattery cousin, drizzled cookies require a royal icing that’s been thinned to a watery consistency. Also similar to splattering, start with a wet base for an embedded look or a dry base to create a textured appearance.

Dip a fork into the thinned icing and drizzle it across the cookie. Repeat with other colors.

Drizzle each color in the same direction or switch it up to create a more varied design.

5. Brush, Baby

Very simply, just dip a paintbrush in royal icing and spread it across the surface of the cookie. It’s that easy and it might just be my new favorite way to ice a cookie.

Use the paintbrush to further enhance your cookie’s design by dropping little drips of icing into the wet base coat.

ya’ll i just can’t wait to make these! And my favorite one is step #4 i can imagine drawing anything that i want it to be on the cookie so easily! I’m so exited!
This is going to be my new fun thing to do!
All images via Erin Bakes
https://www.mybluprint.com/article/5-ways-to-decorate-sugar-cookies-without-piping

This sounds like so much fun. And they look so good too! I usually avoid decorating cookies, because then they look like a 7 year old made them lol. But those are so cute!
LikeLike
This is the type of content I need in my life. Thanks for sharing 🙂
LikeLiked by 1 person
These are awesome little easy tricks to make a super cute cookie! This definitley seems do-able, I’ve watched professionals decorate them and I never understood how they get them to look so smooth. It seems like one of those that they make it look easier than it really is. So glad you shared this
LikeLiked by 1 person
This is such a fun idea! This is something I would actually do! I hate piping!
LikeLiked by 1 person
I bet you could make some beautiful cookies!
LikeLiked by 1 person